
To view your current list of ToDos go to the menu items View>ToDos. It will look something like the following:
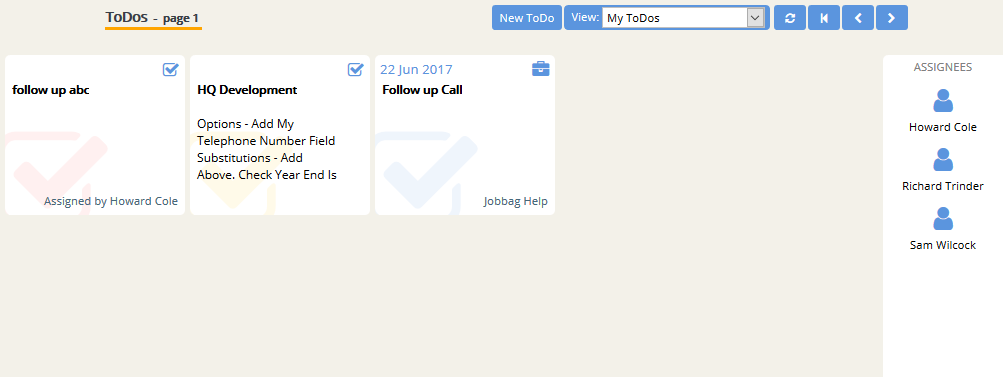
ToDos can be created, edited and assigned to team members from this screen.
To Create a new ToDo
Clicking the “New ToDo” button shows a form similar to this:
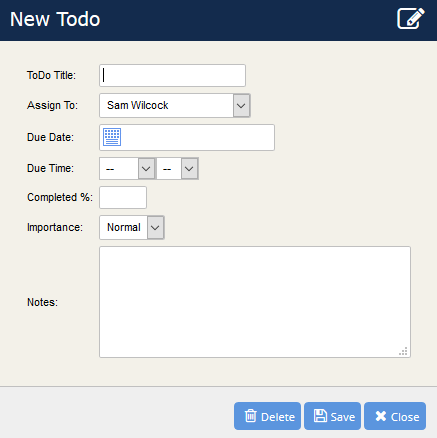
Enter a title and assign the new ToDo to a team member (it defaults to yourself). HQ allows you to easily track ToDos that you have assigned.
You can optionally add a due date and time and extra notes. Setting a due time will change the display order of ToDos on your screen and cause a message to be displayed on all HQ screens reminding you of an overdue ToDo.
Setting the Importance of a ToDo causes it to be colour coded and similarly changes the display order of all ToDos.
Click Save to save your ToDo or Cancel to disregard any changes.
To Edit an existing ToDo
Click on the text of an existing ToDo to open the ToDo editor. This is identical to the form above, except the form is filled-in with the relevant information.
Make any changes you wish and click Save. Please note that changes to Due time and Date or Importance may change the display order of the ToDos.
To Assign a ToDo
To assign a ToDo to another team member you can either add a new ToDo as described above and change the “Assign To” field to be one of your team members, or you can click on one of your team members in the Assignee list on the right hand side of the page and that will create a ToDo with them already selected as the person to assign the ToDo to.
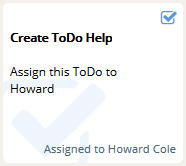
You can view a list of Assigned ToDos by changing the view setting on the ToDos button bar to “Assigned ToDos”. Here is an example of an assigned ToDo. You will see the name of the assignee at the bottom-right of every assigned ToDo.
Any changes made by the assignee will of course be visible to you when looking at your Assigned ToDos screen. The assignee may at any time pass the ToDo to another team member (including you).
To Delete a ToDo, click on the text of the two to open it and click the delete button.