
Making Requests
As part of the new GDPR additions to HQ we have introduced the ability to make data and delete requests, these request can be made by any member of your HQ team, but can only be denied or fulfilled by the Administrators in your HQ team.
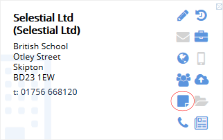
Requests are made by creating a note for a person or a business, this is done by navigating to the person or business card and clicking on the note icon, as shown below.
Once you click the note icon it will pop up the usually note dialog box that you would use to make a note against a person or business, standard notes can be anything from notes about a telephone call to notes about documents that have been printed.
To use the data and delete request notes, you will first need to select them from the drop down box at the top of the note dialog page, this will then also give you two more fields that you wouldn’t have with any of the other notes these are: Request Date and Relationship Manager, these fields are here so that the requests can later be ordered by date when they are in the administration system and can also be traced back to the team member that made the request.
The Request Date is a standard HQ date picker that you will have used across HQ to enter dates into fields such as the start and end of a calendar event.
The Relationship Manager is a drop down box of all the currently active team members of your HQ, this will default to be the team member that is making the request.
Please see below for an example of a data request.

Once you click save on the note it will appear in the person or business history and will be linked to them, it will also appear in the Administration system under the requests section of the GDPR tab.
Once you save a request it will be submitted to be reviewed by an administrator to be denied or fulfilled, from this point only administrators can edit request notes.
Viewing Requests
As mentioned before only Administrators can access request to deny or fulfill them once they have been submitted, however requests can be viewing in the person or business history but can only be edited by a user with administrator privileges.
To access the submitted requests you will need to go to Tools->Administration the click on GDPR->Requests.
Once you have navigated to the request section you will see a similar view to the one below.
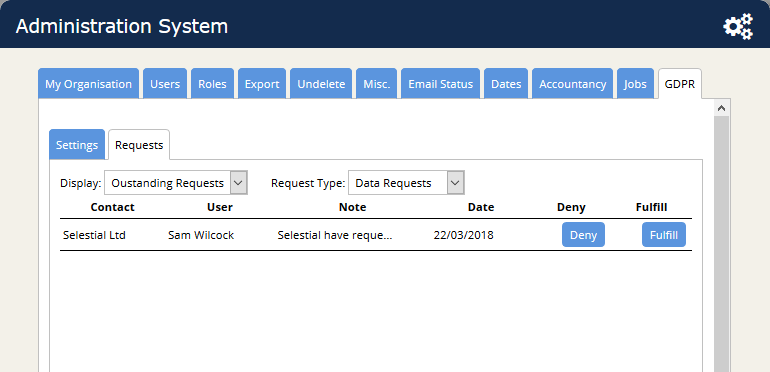
As you can see there are two options for filtering the requests. The first one is which request to display, as you can see I have it selected on Outstanding Requests this is the default for which request to display, the other options are Denied Requests and Fulfilled Requests.
- Outstanding Requests – this shows a list of requests which are yet to be actioned they are order by date with the oldest appearing at the top of the list.
- Denied Requests – this shows a list of requests that have been denied by the Administrator, when requests are in this view you cannot deny or fulfill them again.
- Fulfilled Requests – this shows a list of requests that have been fulfilled by the Administrator, when requests are in this view you cannot fulfill or deny them again.
The second filtering options for requests is the Request Type this is simply whether you want to view Data Requests or Delete Requests.
Denying & Fulfilling Requests
Denying and fulfilling of requests is done in the administration system shown above. When you view the list of outstanding requests you will see two buttons at the end of each row of each requests, these are the deny and fulfill buttons.
As you can see the note of the request has been cut down in order to fit into the table, to see the full note of the request you have hover over the note which will pop up a box with the full note inside.
- Denying a Request – when you click the deny button for either a data or delete request you will see a message telling you that you have denied the request and it will be marked as denied. The request will then be moved from the outstanding list to the denied list and will also be flagged as denied when you open it in the person or business history.
- Fulfilling Delete Requests – when you click the fulfill button on a delete request a message will pop up asking if you really want to delete the person or business, if you click no the request will stay in the outstanding requests list and you will still have the option to deny or fulfill it. If you click yes HQ will then delete the person or business completely from the database, which will then mean that the person or business cannot be accessed again.
- Fulfilling Data Requests – when you click the fulfill button on a data request a message will pop up saying that an email has been sent to Selestial with the request attached. Selestial will then contact you regarding this request.